Build Your First Watt Application
Learn how Watt transforms API development by providing a unified application server that orchestrates multiple applications with shared configuration, logging, and deployment.
What You'll Learn
In this tutorial, you'll experience Watt's unified development workflow by building a Todo API. By the end, you will:
- ✅ Set up a Watt application server with unified development environment
- ✅ Add a database application to Watt that auto-generates REST and GraphQL APIs
- ✅ Experience application orchestration - how Watt manages multiple applications seamlessly
- ✅ See unified logging and monitoring across all applications in your application
- ✅ Understand Watt's value proposition - one server, multiple applications, unified workflow
- ✅ Deploy a complete application with a single command
Time to complete: 30 minutes
Skill level: Beginner (basic SQL and JavaScript knowledge helpful)
Why Watt for Modern Development?
Traditional Node.js development requires managing separate servers, configurations, and deployments for each part of your application. Watt eliminates this complexity by:
- Unified Application Server: One server runs multiple applications (database APIs, custom logic, frontends)
- Shared Configuration: Environment variables, logging, and monitoring work consistently across all applications
- Application Orchestration: Applications communicate seamlessly without complex networking setup
- Single Deployment: Deploy your entire application stack with one command
- Built-in Observability: Unified logging, metrics, and health checks out of the box
This means you can focus on building features instead of managing infrastructure.
Prerequisites
Before starting, ensure you have:
- Node.js (v22.19.0+)
- npm (comes with Node.js)
- A code editor (like VS Code)
- Basic familiarity with the command line
You'll install the Platformatic CLI during the tutorial.
Understanding Watt's Architecture
Watt acts as your application server that can host multiple applications:
- Database applications for auto-generated APIs
- HTTP applications for custom business logic
- Frontend applications for web applications
- Gateway applications for API gateways
All applications share the same configuration, logging, and deployment - giving you a unified development experience.
Step 2: Add Your First Application to Watt
Now we'll add our first application to the Watt application server - a database application that will automatically create REST and GraphQL APIs from our schema.
Why Add Applications to Watt?
Instead of running a separate database server, API server, and frontend server, Watt lets you run them all as applications within one application server. This means:
- Shared configuration - one
.envfile for all applications - Unified logging - all application logs in one stream
- Single deployment - deploy everything together
- Application communication - applications can talk to each other seamlessly
Navigate to your web directory and add a database application:
Run create-wattpm
To start the Watt creator wizard, run the appropriate command for your package manager in your terminal:
- npm
- yarn
- pnpm
npm create wattpm
yarn create wattpm
pnpm create wattpm
This interactive command-line tool will guide you through setting up a new Watt project. For this guide, please choose the following options:
Hello YOURNAME, welcome to Watt 3.0.0!
? Where would you like to create your project? .
✔ Installing @platformatic/runtime@^3.0.0 using npm ...
? Which kind of application do you want to create? @platformatic/db
✔ Installing @platformatic/db@^3.0.0 using npm ...
? What is the name of the application? db
? What is the connection string? sqlite://./db.sqlite
? Do you want to create default migrations? yes
? Do you want to use TypeScript? no
? Do you want to create another application? no
? What port do you want to use? 3042
After completing the wizard, your Watt application will be ready in the specified folder. This includes example migration files, plugin scripts, routes, and tests within your application directory.
If the wizard does not handle dependency installation, ensure to run npm/yarn/pnpm install command manually.
wattpm sets up workspaces for the selected package manager. Running a manual installation with a different package manager may cause issues or trigger warnings.
✓ Success Check: You should see a web/ directory created with configuration files inside.
Experience Watt's Unified Configuration
Take a moment to examine the files Watt created:
watt.json- Your application server configuration.env- Environment variables shared across all applicationsweb/- Directory where your applications will live
Notice how Watt uses one configuration file and shared environment variables for your entire application. This is different from managing separate configurations for each application.
Let's verify everything works:
npm start
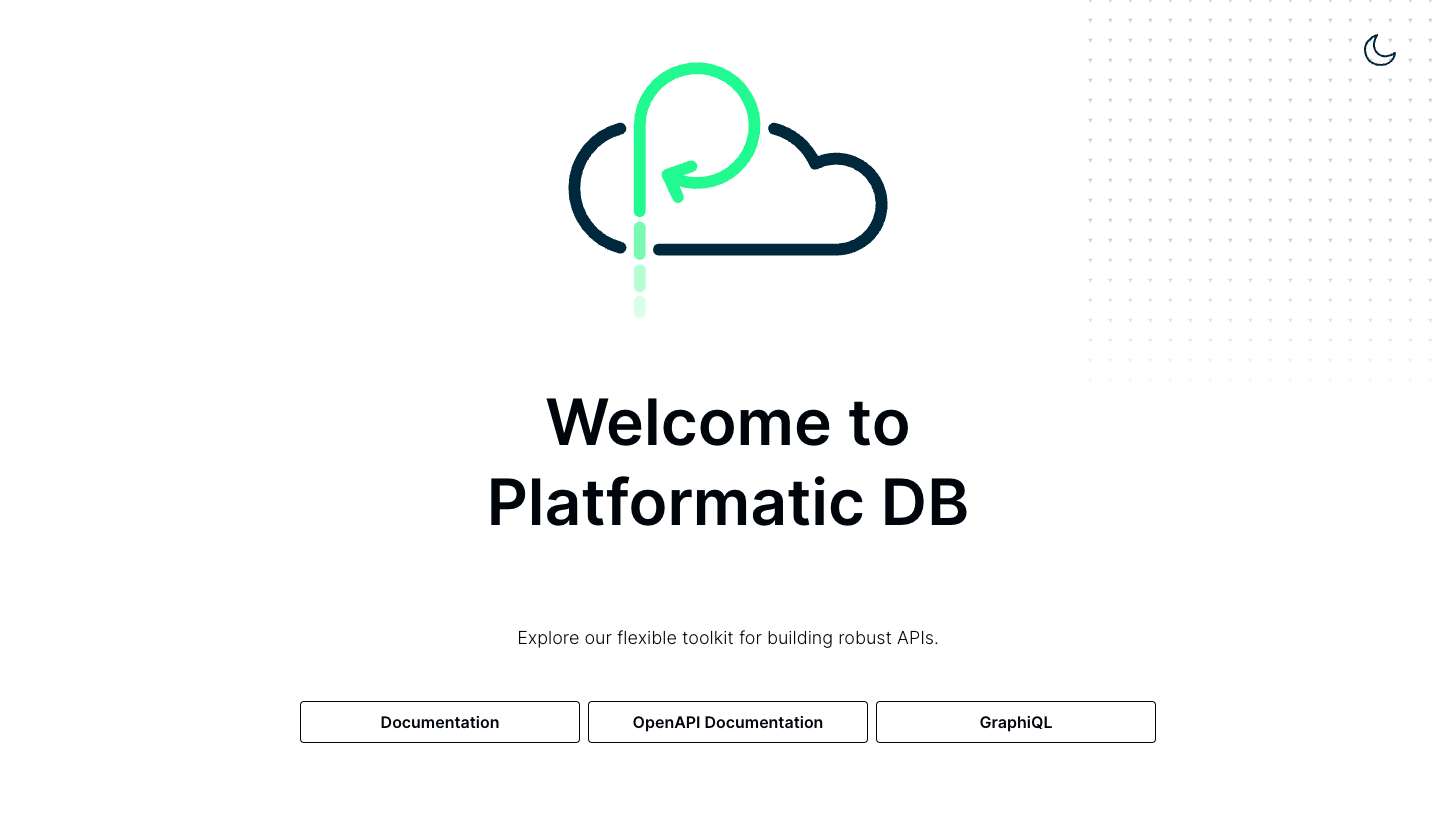
Open your browser to http://localhost:3042/ (or the port shown in your terminal).
✓ Success Check: You should see the Platformatic welcome page with links to OpenAPI documentation.
Step 4: Define Your Application's Data Schema
Now we'll define the database structure for our Todo API application using migrations. This demonstrates how Watt applications manage their own data while staying integrated with the overall application.
Why Migrations?
Migrations provide version control for your database schema. They let you:
- Track schema changes over time
- Safely update production databases
- Share schema changes with your team
Database Choice: SQLite for Easy Start, Enterprise Ready
The Platformatic DB application (running within your Watt application server) uses SQLite by default to get you started quickly - no separate database server setup required!
However, the Platformatic DB application is enterprise-ready and supports:
- PostgreSQL (recommended for production)
- MySQL/MariaDB
- SQLite (great for development and prototyping)
Important distinction:
- Watt = Your application server that orchestrates multiple applications
- Platformatic DB application = One type of application that runs within Watt, handles database operations
Switching to PostgreSQL (Enterprise Setup)
If you prefer to use PostgreSQL from the start (recommended for enterprise development):
-
Start PostgreSQL (using Docker for convenience):
docker run --name postgres-dev -e POSTGRES_PASSWORD=password -e POSTGRES_DB=todo_app -p 5432:5432 -d postgres:15 -
Update the connection string in your project root
.envfile:# Replace the SQLite DATABASE_URL with PostgreSQL
DATABASE_URL=postgres://postgres:password@localhost:5432/todo_app -
Continue with the tutorial - all migration commands work the same way!
For MySQL users: Replace with mysql://user:password@localhost:3306/todo_app
The beauty of this architecture is that Watt manages the application orchestration while each application (like Platformatic DB) handles its own concerns. Your application code remains identical regardless of which database the DB application connects to.
Architecture Overview: Watt vs Platformatic DB Application
| Component | Role | Responsibilities | Configuration |
|---|---|---|---|
| Watt | Application Server | • Orchestrates multiple applications • Manages unified configuration • Handles application discovery • Provides unified logging • Manages deployment | watt.json + shared .env |
| Platformatic DB Application | Database Application | • Connects to your database • Auto-generates REST/GraphQL APIs • Handles migrations • Manages data operations • Provides type generation | web/db/platformatic.json |
Key Distinction:
- Watt is the container that runs your application
- Platformatic DB is one application running inside Watt
- You can have multiple applications (DB, HTTP, Frontend) all managed by one Watt instance
Create the Users Table
The wizard created a sample migration file (001.do.sql) with a movies table. Since that migration was already applied when we started the server, we'll create a new migration file for our Users table.
Create a new file web/db/migrations/002.do.sql:
CREATE TABLE IF NOT EXISTS Users (
    id INTEGER PRIMARY KEY,
    username TEXT NOT NULL UNIQUE,
    password TEXT NOT NULL,
    created_at DATETIME DEFAULT CURRENT_TIMESTAMP
);
Create web/db/migrations/002.undo.sql to define how to reverse this migration:
DROP TABLE Users;
Why Plural Table Names?
Platformatic generates RESTful endpoints based on your table names. Using plural names (Users, not User) creates more intuitive API endpoints like /users for listing all users.
Create the Todos Table
Create a new file web/db/migrations/003.do.sql:
CREATE TABLE IF NOT EXISTS Todos (
    id INTEGER PRIMARY KEY,
    user_id INTEGER,
    title TEXT NOT NULL,
    description TEXT,
    due_date DATE,
    completed BOOLEAN DEFAULT 0,
    FOREIGN KEY (user_id) REFERENCES Users(id)
);
Create web/db/migrations/003.undo.sql:
DROP TABLE Todos;
Apply Your Migrations
Now let's create these tables in your database:
npx wattpm db:migrations:apply
✓ Success Check: You should see output confirming the migrations were applied. Also notice:
- A
plt-env.d.tsfile was created with TypeScript types - A
types/folder contains detailed type definitions for your tables
Why Auto-Generated Types?
The Platformatic DB application automatically generates TypeScript types from your database schema. This gives you:
- Type safety when writing custom plugins for any application in your Watt application
- IntelliSense in your editor
- Compile-time error checking across all applications
Step 5: Explore Your Application's Auto-Generated API
Start your Watt application with all applications:
npm run dev
Open http://localhost:3042/ in your browser.
✓ Success Check: You should see the Platformatic welcome page.
Step 6: Experience Watt's Unified Development Environment
Before exploring the API endpoints, let's see how Watt provides a unified development experience.
Unified Logging and Monitoring
Open your terminal where Watt is running (npm run dev). Notice how all applications log to the same stream with consistent formatting. You'll see logs from:
- The main Watt server
- Your database application
- Any requests between applications
This unified logging means you don't need to check multiple terminals or log files to debug issues across your applications.
Application Discovery and Communication
Watt automatically handles application discovery. Your database application is accessible at / and other applications you add later can communicate with it using internal networking - no complex configuration needed.
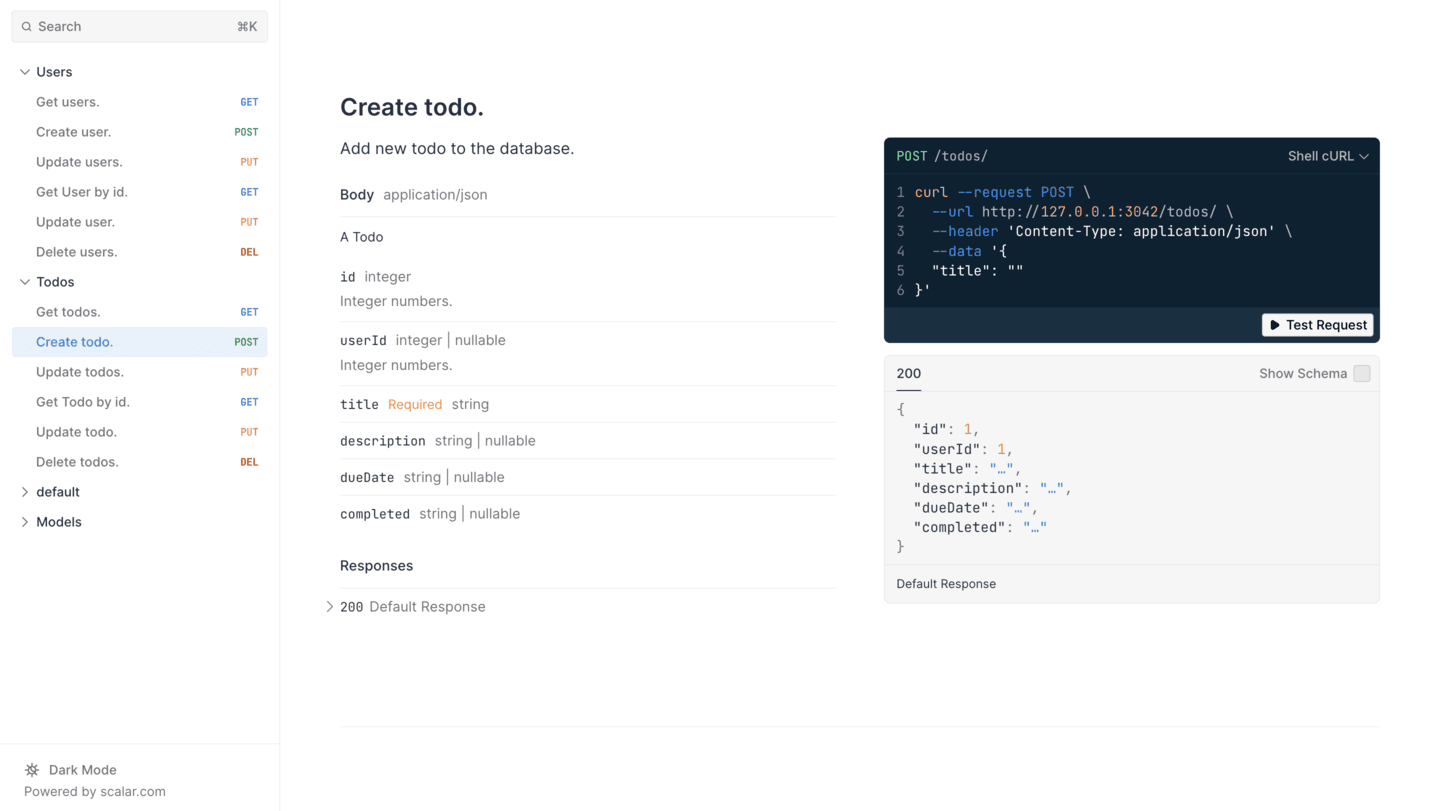
Discover Your Auto-Generated API Endpoints
Click on the OpenAPI Documentation link. This opens an interactive API explorer where you can:
- See all auto-generated endpoints
- Test requests directly in the browser
- View request/response schemas
Test Your API
Let's create your first todo item:
- Find the
POST /todosendpoint - Click Test Request
- Enter this JSON body:
{
  "title": "Complete Platformatic tutorial",
  "description": "Learn how to build APIs with Platformatic",
  "completed": false
} - Click Send
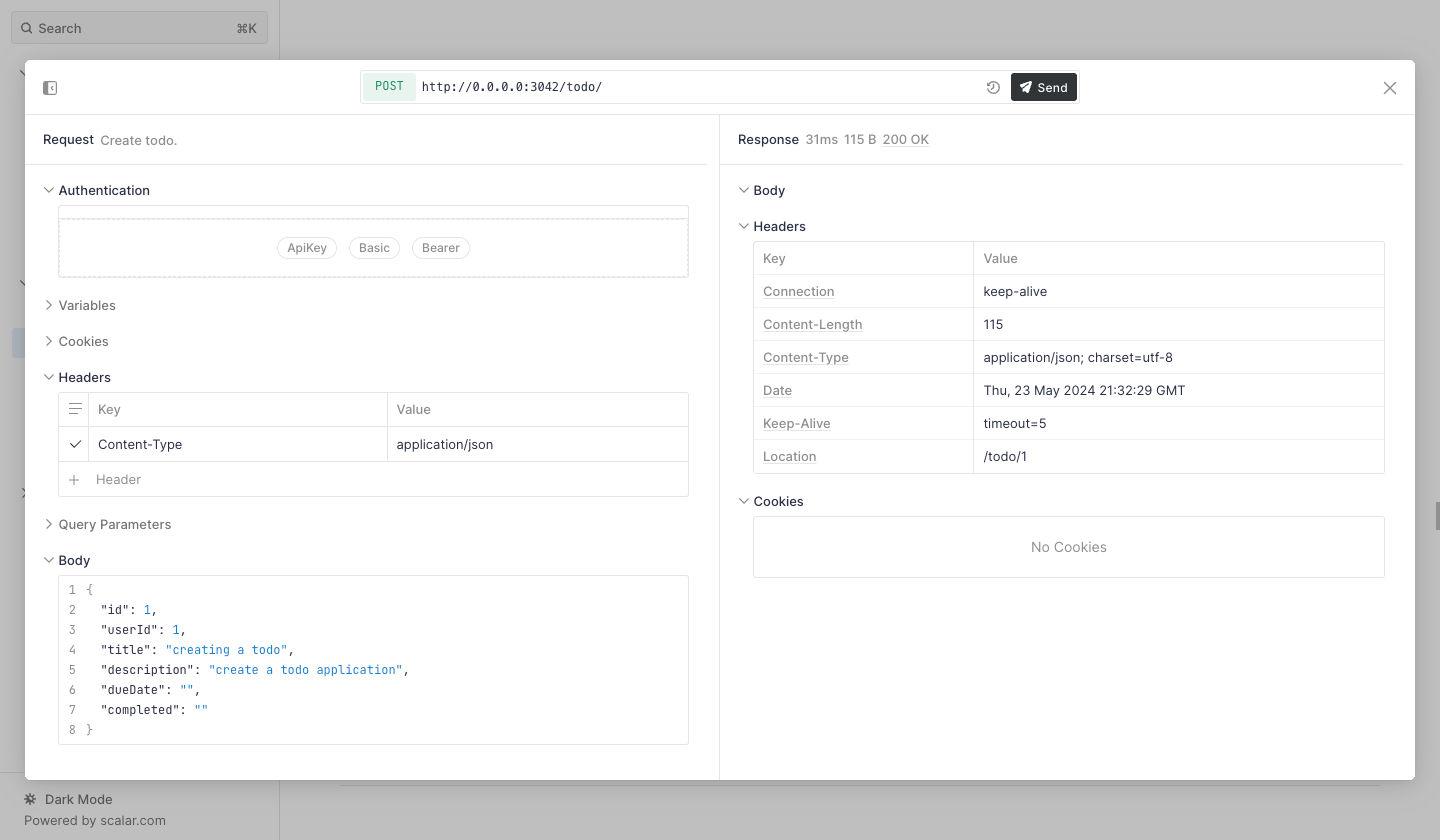
✓ Success Check: You should receive a 200 OK response with the created todo item, including its generated ID.
Available Endpoints
The Platformatic DB application generated these REST endpoints for each table:
GET /users- List all usersPOST /users- Create a userGET /users/{id}- Get a specific userPUT /users/{id}- Update a userDELETE /users/{id}- Delete a user
The same pattern applies to /todos. You also get GraphQL endpoints at /graphql!
Step 7: Prepare for Multi-Application Architecture
One of Watt's key benefits is supporting multiple applications in one application. Let's configure CORS so you can easily add a frontend application later.
Why Configure CORS in Watt?
When you add a frontend application to your Watt application (like Next.js, React, or Vue), it needs to communicate with your database application. Watt makes this easy with unified configuration - set CORS once and it works across all your applications.
Open your project root .env file and add:
PLT_SERVER_CORS_ORIGIN=http://localhost:3000
Now add the CORS configuration to your watt.json file. Add the cors property inside the server section:
{
  "server": {
    "hostname": "{PLT_SERVER_HOSTNAME}",
    "port": "{PORT}",
    "cors": {
      "origin": "{PLT_SERVER_CORS_ORIGIN}"
    }
  }
}
Restart your application with npm run dev.
✓ Success Check: Your API responses will now include the access-control-allow-origin header, allowing frontend applications on http://localhost:3000 to make requests.
🎉 Congratulations!
You've successfully built your first Watt application! Let's review what you accomplished and why this approach is transformative:
What You Built with Watt
- ✅ A unified application server running multiple applications seamlessly
- ✅ Application orchestration - database application integrated into your application
- ✅ Unified configuration - single
.envfile and shared settings - ✅ Integrated logging - all applications logging to one stream
- ✅ Auto-generated APIs with zero boilerplate code
- ✅ Production-ready setup with TypeScript types and documentation
- ✅ Multi-application foundation ready for frontend and additional applications
What Makes Watt Different
Unlike traditional Node.js development where you manage separate servers, configurations, and deployments:
Traditional Approach:
- Separate database server + API server + frontend server
- Multiple configuration files and environment setups
- Complex inter-application communication
- Fragmented logging and monitoring
- Multiple deployment processes
Watt Approach:
- One application server hosts all applications
- Unified configuration across your entire application
- Automatic application discovery and communication
- Integrated observability with unified logging
- Single deployment for your complete application stack
What's Next?
Now that you understand Watt's unified approach, you can expand your application:
- Connect to Your Enterprise Database: Switch from SQLite to PostgreSQL, MySQL, or your production database
- Add a Frontend Application: Add a Next.js, Astro, or React capability to your Watt application
- Add Custom HTTP Applications: Create additional applications for business logic that work alongside your database application
- Add a Composer Application: Create an API gateway that aggregates multiple applications
- Experience Multi-Application Deployment: Deploy your entire application stack with one command
- Add Authentication: Implement authentication that works across all applications in your Watt application
Explore Watt's Full Capabilities
Get Help
- Check the Reference Documentation for detailed configuration options
- Join our Community Discord for support
- Browse Example Applications on GitHub
Happy building! 🚀