Configure JWT with Keycloak
Keycloak is an open source identity and access management solution that can be integrated with Platformatic DB through JSON Web Tokens (JWT) tokens. Keycloak is a powerful and complete solution, in this guide we will show how to integate it with Platformatic in a simple case. For more complex scenarios on the Keycloak side, please refer to the latest Keycloak documentation.
Keycloak Setup
Start a Keycloak server, this can be done using docker:
docker run -p 8080:8080 -e KEYCLOAK_ADMIN=admin -e KEYCLOAK_ADMIN_PASSWORD=admin quay.io/keycloak/keycloak:24.0.2 start-dev
Keep it running in its own terminal.
Setup Realm, Client and Roles
Access the Keycloak admin console at http://127.0.0.1:8080/auth/admin and login with the credentials admin/admin.
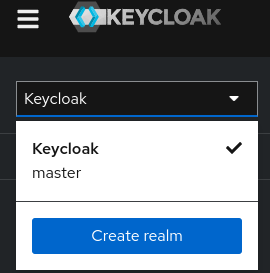
Now click on the selecton the left and click on "Create realm":
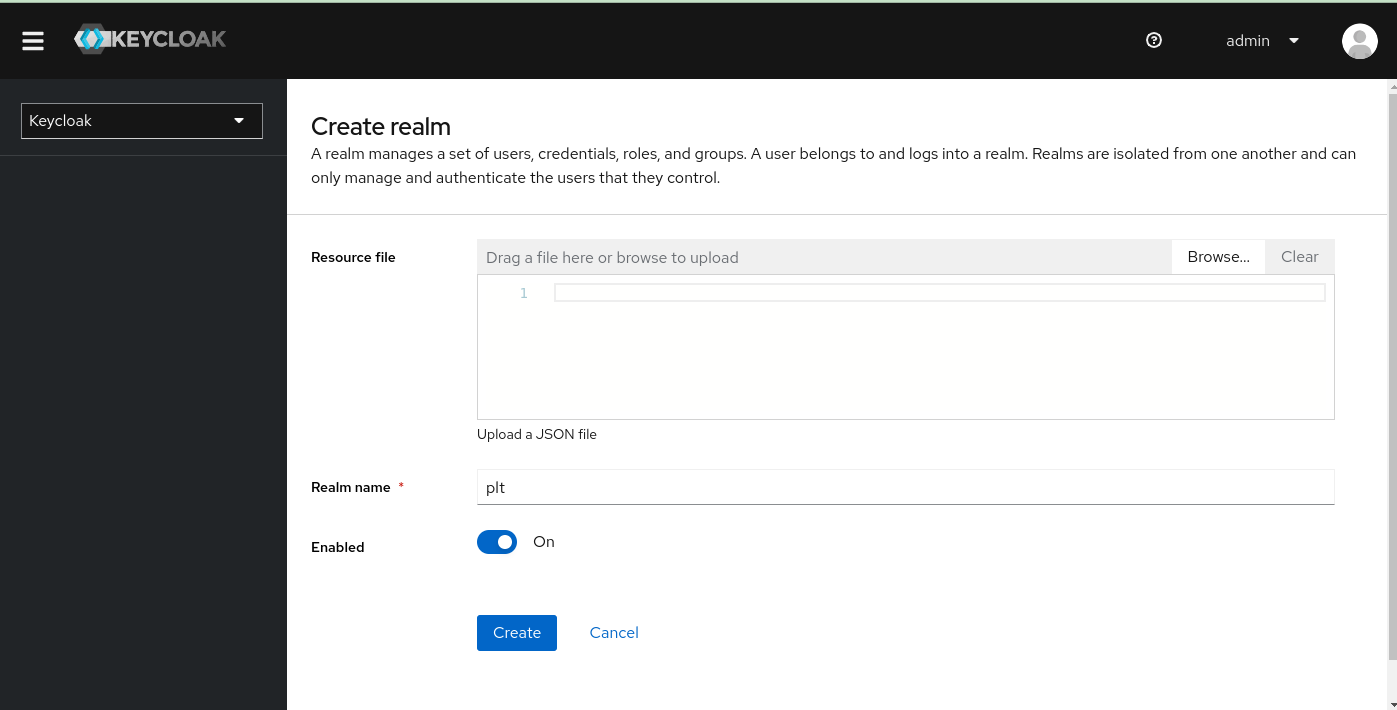
Name the realm plt and click "Create".
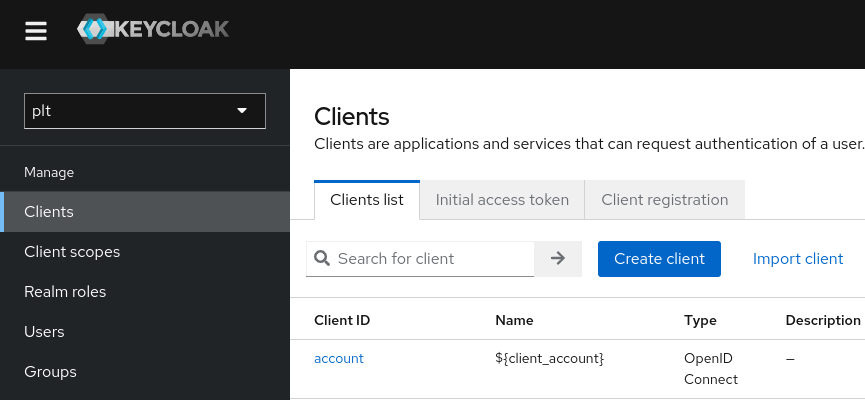
Now click on the "Clients" tab and click on "Create Client" (clients are applications that can authenticate with Keycloak).
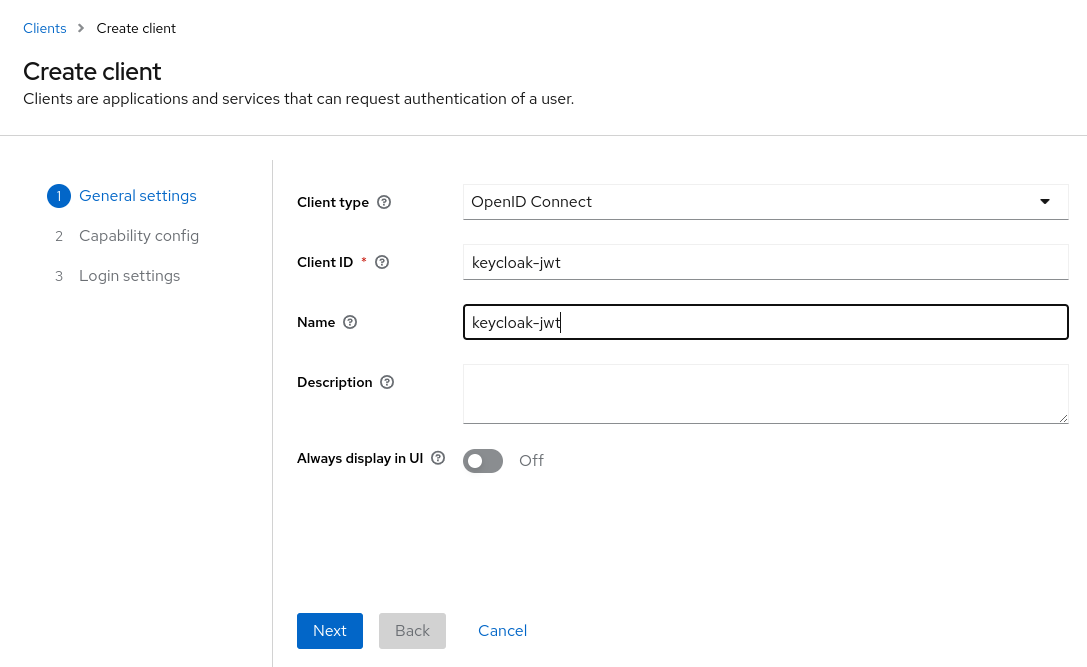
Name the client keycloak-jwt and click "Next".
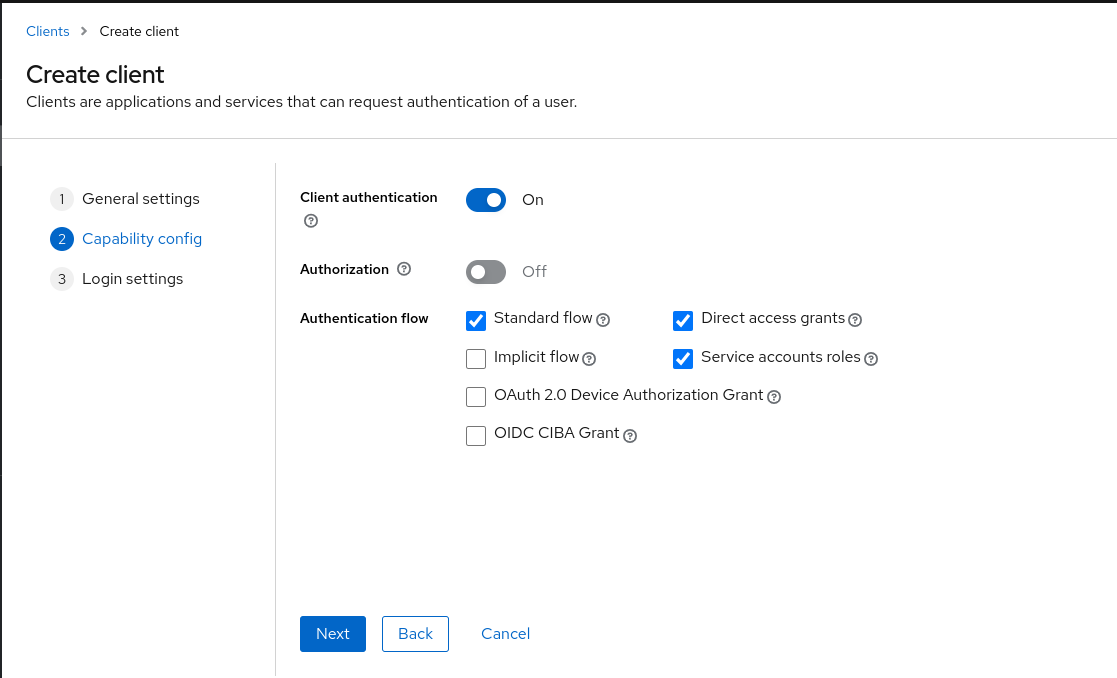
On the "Capability config" set to "ON":
- Client authentication
- Standard flow
- Direct access grants
- Service account roles
Then click on "Next"
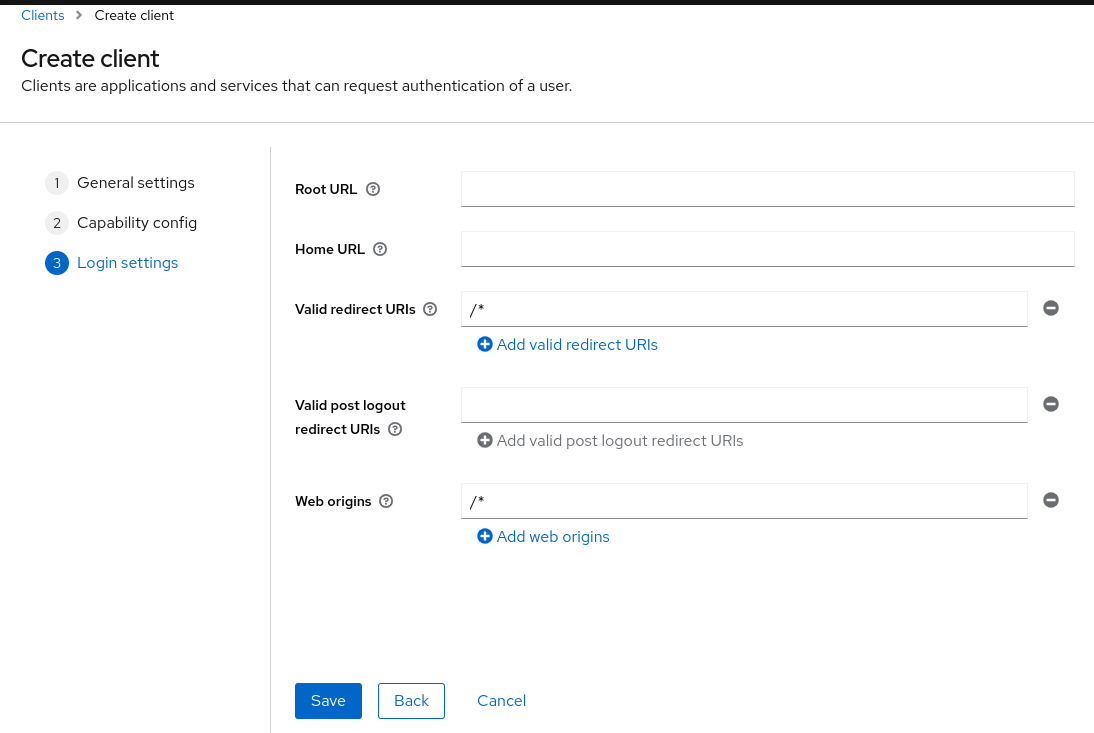
On the "Login settings" set:
- Valid redirect URIS;
/* - Web Origins:
/*
Then click on "Save"
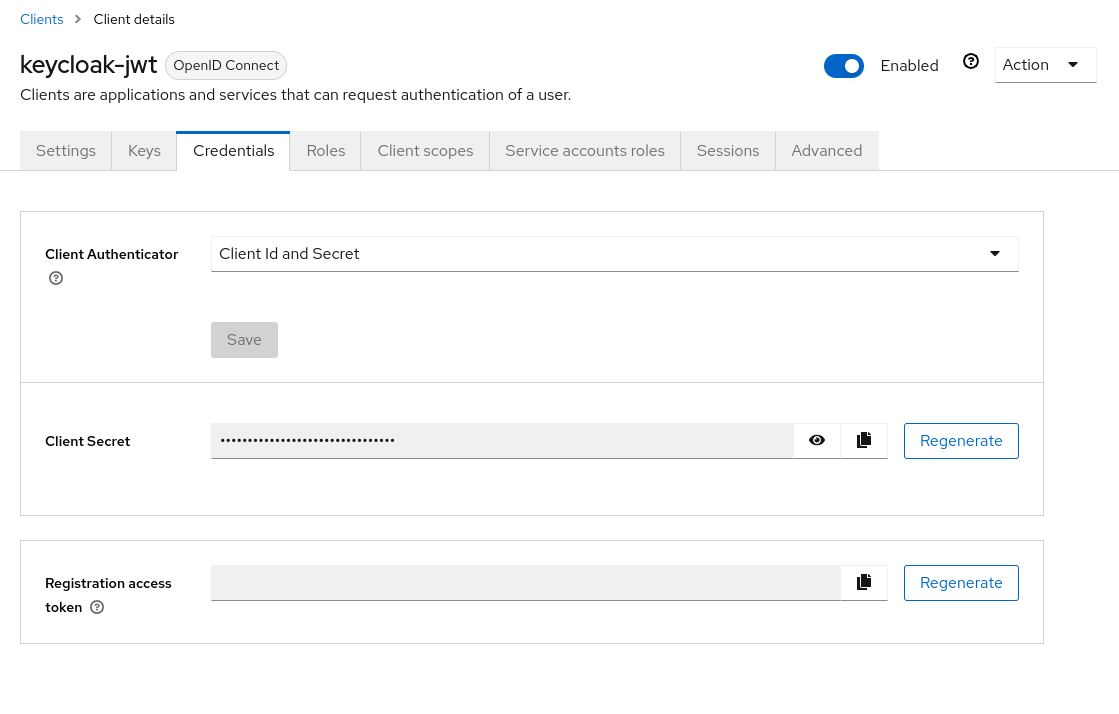
Now in "Clients" select the keycloak-jwt client and click on the "Credentials" tab. Here you can see the client secret, copy it and save it in a safe place.
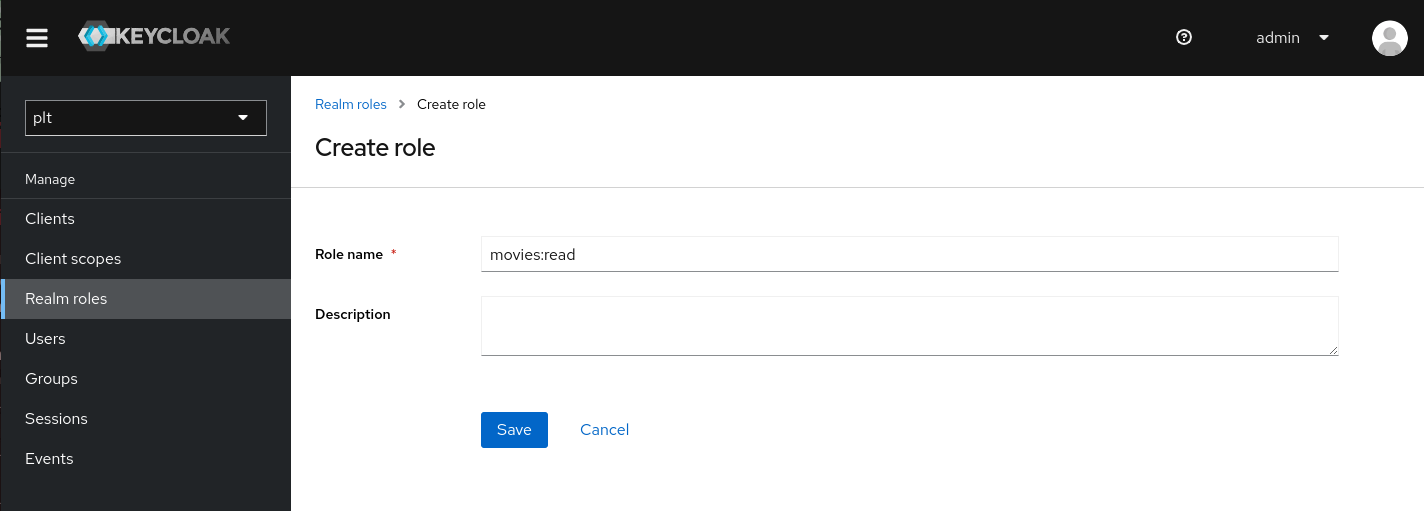
Now click on the "Roles" tab and create a new role called movies:read and save
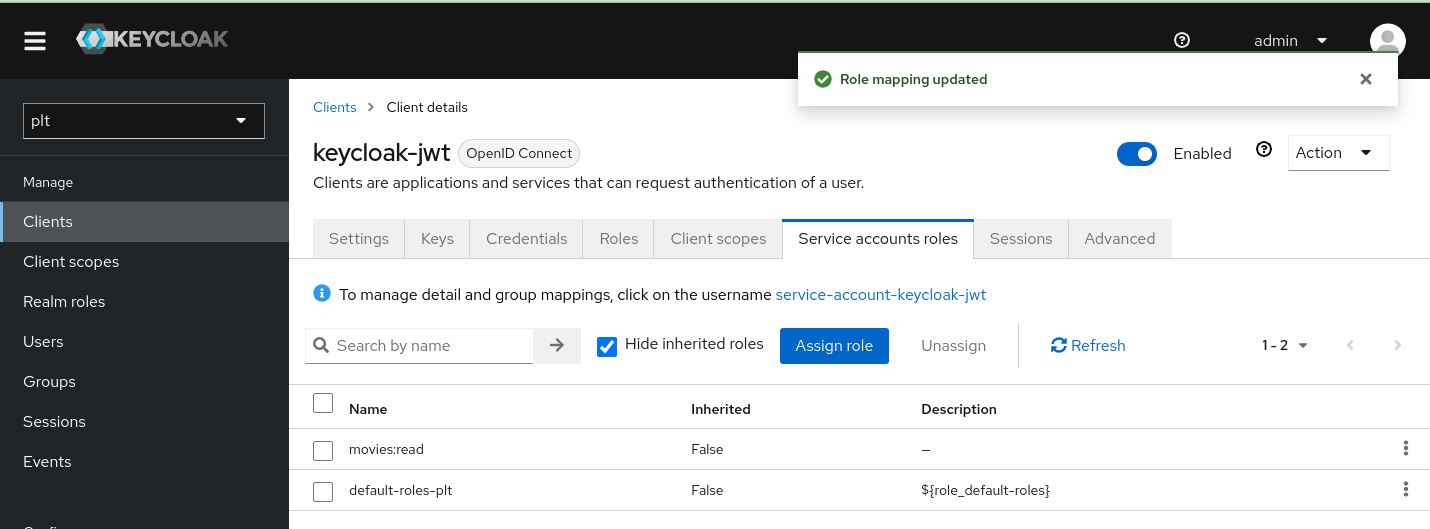
Go back to the "Clients" tab, select the keycloak-jwt client and click on the "Service Account Roles" tab. Here you can assign the movies:read role to the client.
Test the JWT creation
We can use the keycloak-jwt client to create a JWT token for the user user with the role movies:read.
Change YOUR_CLIENT_SECRET with the client secret you saved before.
  curl -L --insecure -s -X POST 'http://127.0.0.1:8080/realms/plt/protocol/openid-connect/token' \
 -H 'Content-Type: application/x-www-form-urlencoded' \
 --data-urlencode 'client_id=keycloak-jwt' \
 --data-urlencode 'grant_type=client_credentials' \
 --data-urlencode 'client_secret=YOUR_CLIENT_SECRET'
You should get a response like this:
{"access_token":"eyJhbGciOiJSUzI1NiIsInR5cCIgOiAiSldUIiwia2lkIiA6ICJLaWhpNVFqRExmWTVOWWtSWmw1QUxvVTgyOFFSMHBXbmJjRk1ya2JpVWdvIn0.eyJleHAiOjE3MTI4Mjk5MzMsImlhdCI6MTcxMjgyOTYzMywianRpIjoiYzJmOWY4NjItZTdlOC00YTcxLThlNzQtNzNiNDIzZWJiNGI2IiwiaXNzIjoiaHR0cDovLzEyNy4wLjAuMTo4MDgwL3JlYWxtcy9wbHQiLCJhdWQiOiJhY2NvdW50Iiwic3ViIjoiNWIzOWI4ZmUtNDdlOC00ZmYzLTgyOWItYzhjYmNjNWY2OWIxIiwidHlwIjoiQmVhcmVyIiwiYXpwIjoia2V5Y2xvYWstand0IiwiYWNyIjoiMSIsImFsbG93ZWQtb3JpZ2lucyI6WyIvKiJdLCJyZWFsbV9hY2Nlc3MiOnsicm9sZXMiOlsibW92aWVzOnJlYWQiLCJkZWZhdWx0LXJvbGVzLXBsdCIsIm9mZmxpbmVfYWNjZXNzIiwidW1hX2F1dGhvcml6YXRpb24iXX0sInJlc291cmNlX2FjY2VzcyI6eyJhY2NvdW50Ijp7InJvbGVzIjpbIm1hbmFnZS1hY2NvdW50IiwibWFuYWdlLWFjY291bnQtbGlua3MiLCJ2aWV3LXByb2ZpbGUiXX19LCJzY29wZSI6ImVtYWlsIHByb2ZpbGUiLCJlbWFpbF92ZXJpZmllZCI6ZmFsc2UsImNsaWVudEhvc3QiOiIxNzIuMTcuMC4xIiwicHJlZmVycmVkX3VzZXJuYW1lIjoic2VydmljZS1hY2NvdW50LWtleWNsb2FrLWp3dCIsImNsaWVudEFkZHJlc3MiOiIxNzIuMTcuMC4xIiwiY2xpZW50X2lkIjoia2V5Y2xvYWstand0In0.c4sjvdNxw5srjev2KXC4keNoG8SVUOggTCwNFLGOCOo55QNfBeaKb-bGZ4cH5dImkkpgS8940zxf14V7D41xqL6o7FYv4HQOM4E91bqAJrzLr-PUgnzI1GqafgD3ELsA00qMC7_ChaewrbFTR3ROsmn38h_kcMxT_H9YsJLte8GRj_T3EfN1XlEGCRBcZKfx4fZgTMPFcWMOWbd7Xjorp21_hOZzWbk_CNzI4b5UFlzXvU7rcyH2QAgWFqROJl4vt4WIchB8vCc2G5-E2aUzycQJmWZbk6i5Xn01X2cw-3E_qYHnM4eEu-P0TZ9inTl7BFk12zPSMmO62qEGTbB-MQ","expires_in":300,"refresh_expires_in":0,"token_type":"Bearer","not-before-policy":0,"scope":"email profile"}
You can copy the access_token and decode it at jwt.io. You shouldobtain a token with a payload like:
{
  "exp": 1712829933,
  "iat": 1712829633,
  "jti": "c2f9f862-e7e8-4a71-8e74-73b423ebb4b6",
  "iss": "http://127.0.0.1:8080/realms/plt",
  "aud": "account",
  "sub": "5b39b8fe-47e8-4ff3-829b-c8cbcc5f69b1",
  "typ": "Bearer",
  "azp": "keycloak-jwt",
  "acr": "1",
  "allowed-origins": [
    "/*"
  ],
  "realm_access": {
    "roles": [
      "movies:read",
      "default-roles-plt",
      "offline_access",
      "uma_authorization"
    ]
  },

  (...)
Note that the token has the role movies:read in the realm_access section.
We will use this token to authenticate with Platformatic DB and the movies:read realm role to authorize the user.
Note that this is a simple example, for instance you might use roles on resources. Refer to Keycloak documentation for more complex scenarios.
Note also that the access token is valid for 5 minutes (keycloak default)
Platformatic Setup and Test
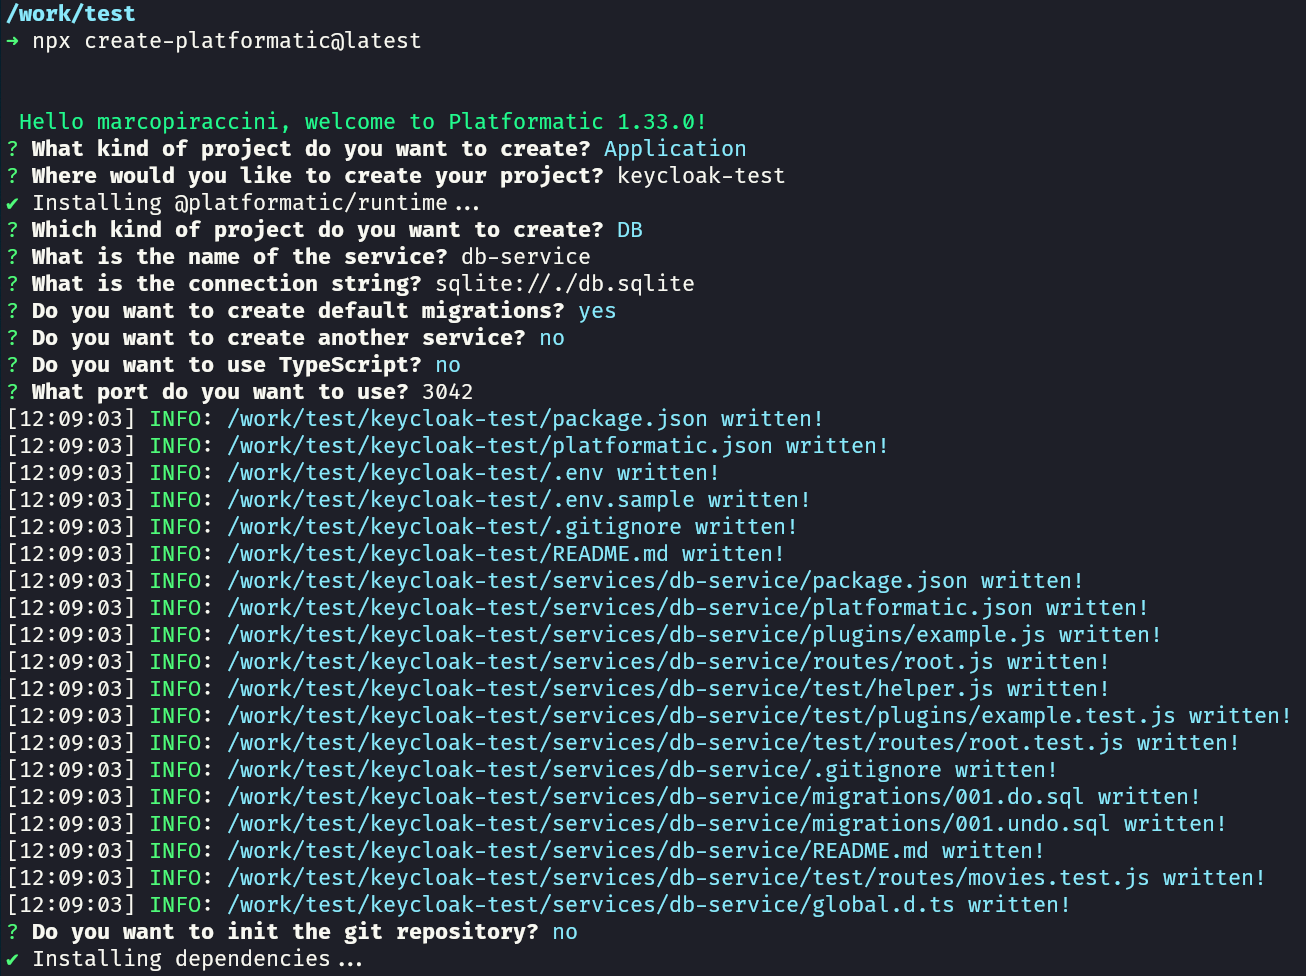
Create a platformatic application using npx create-platformatic@latest.
Call it keycloak-test with a db-service.
Specify to use sqlite and the default migrations:
Go to keycloak-test/services/db-service folder and open platformatic.json.
Add the authorization section with the jwt configuration:
  "authorization": {
    "jwt": {
      "jwks": {
        "allowedDomains": [
          "http://127.0.0.1:8080/realms/plt"
        ],
        "providerDiscovery": true
      }
    },
    "rolePath": "realm_access.roles",
    "rules": [
      {
        "role": "movies:read",
        "entity": "movie",
        "find": true
      }
    ]
  }
Note that the rolePath specify the realm_access.roles path in the JWT token that is used to extract the roles from the token.
The rules section specify that the role movies:read can access the movie entity with the find operation.
Now go to the keycloak-test folder and start the application:
npm start

Test it to invoking the movies API. the request MUST be unauthorized:
curl --request GET \
  --url http://127.0.0.1:3042/movies/

Now you can test to invoke the movies API with the JWT token. Keep in mind that the token expires in 5 minutes, so you might need to get a new one.
curl --location 'http://0.0.0.0:3042/movies' \
--header 'Authorization: Bearer YOUR_ACCESS_TOKEN'
Now you should get a response (an empty array in this case, since we have no movies in the database)
